How to create an Android lab in order to analyse Android applications

Introduction
Creating an Android lab for dynamic and static analysis of android applications is a crucial step for security researchers and developers looking to analyze and improve the security of mobile applications. This guide will provide you with detailed steps to set up a secure and effective testing environment, using tools like Frida, Magisk, and other essential resources. Creating an Android lab for dynamic and static analysis of android applications is a crucial step for security researchers and developers looking to analyze and improve the security of mobile applications. This guide will provide you with detailed steps to set up a secure and effective testing environment, using tools like Frida, Magisk, and other essential resources.

Step 1: Creating our emulator
In order to analyse our Android applications in a simple and secure manner, we first need to create our Android emulator. In order to analyse our Android applications in a simple and secure manner, we first need to create our Android emulator.
For this, we will need the Android SDK, which can be downloaded from the Android Studio download page (https://developer.android.com/studio?hl=en).
Android Studio is Google's IDE for mobile application development. It's not necessary to use the IDE itself, but it’s easier to install the Android SDK from this source.
Once Android Studio is installed, we can access the Virtual Device Manager:
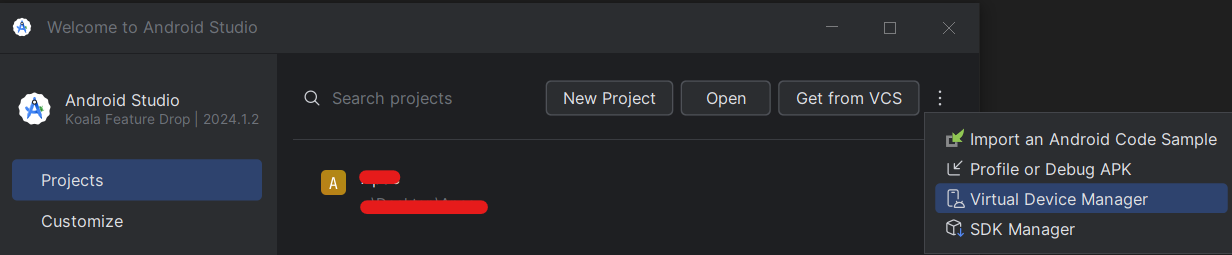
Then click on "Create Device" to create our emulator. We will then have a choice of which hardware we want to emulate:
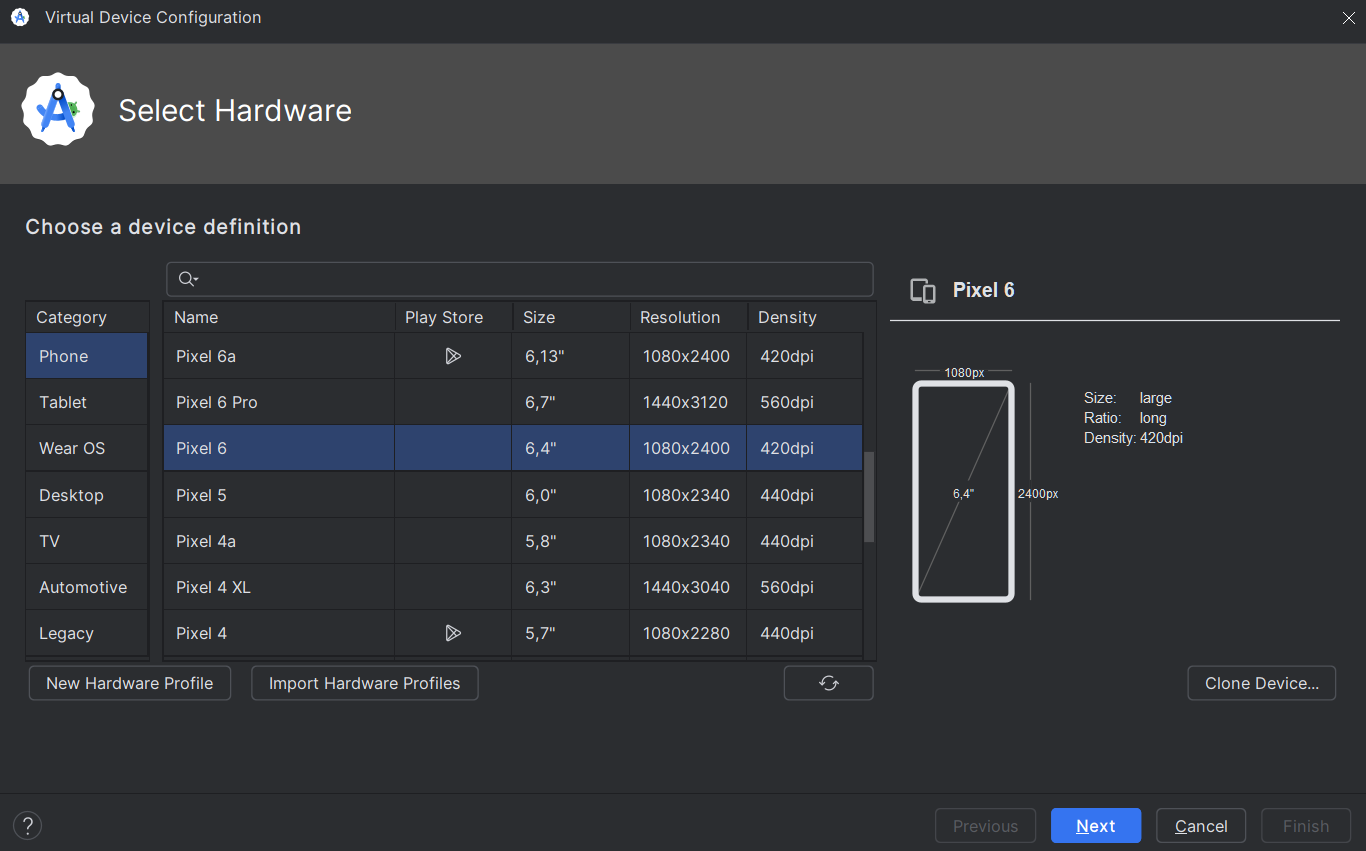
I recommend not opting for the latest Pixel models if your PC isn’t powerful enough. For example, the Pixel 6 works well on the following configuration:
- 8 cores / 8th gen i7
- 16GB RAM / 2400MHz
- NVMe SSD
Once the hardware is chosen, you’ll need to select the version of Android that will run on the phone:

It’s tempting to choose the latest version of Android. However, there are two factors to consider:
-
The minSDK defined in the AndroidManifest.xml file. This specifies the oldest supported version by the application and can be found in the root of the decompiled application.
-
The global distribution of Android versions:
Indeed, our lab should replicate the Android experience of an average user. Therefore, it’s interesting to see the global distribution of Android users worldwide, particularly which version of Android they use.
As of May 1st, 2024, the user distribution was as follows:
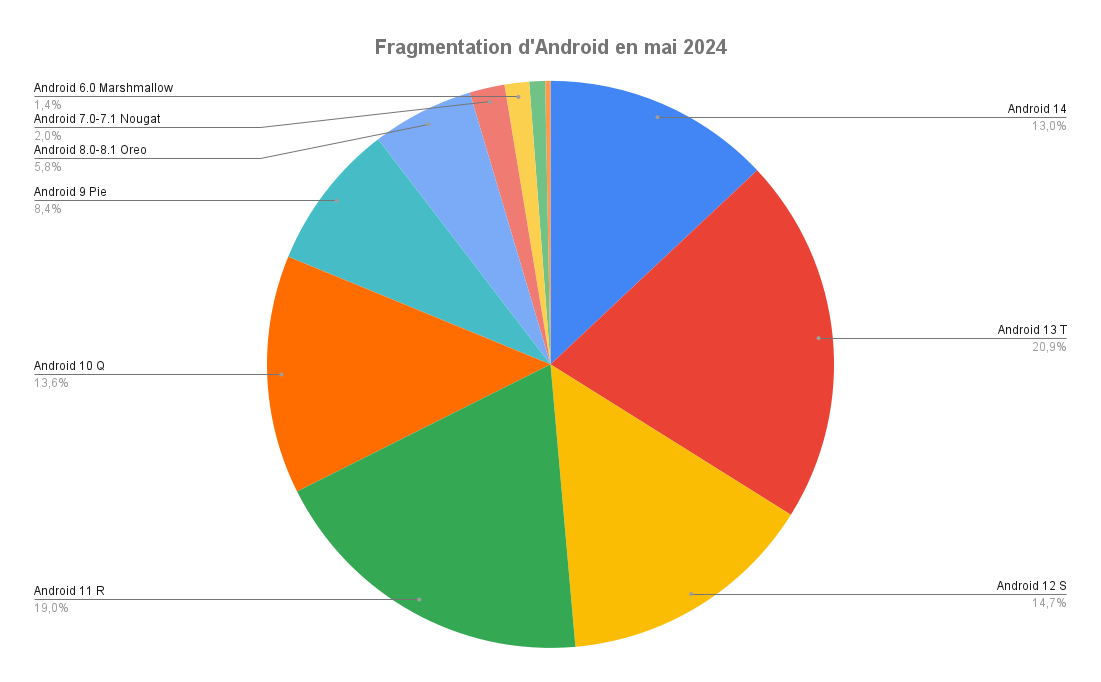
Here, using Android 11 covers 50% of users while saving resources.
Next, click to create the emulator. The download of the .zip file containing the android image will begin:
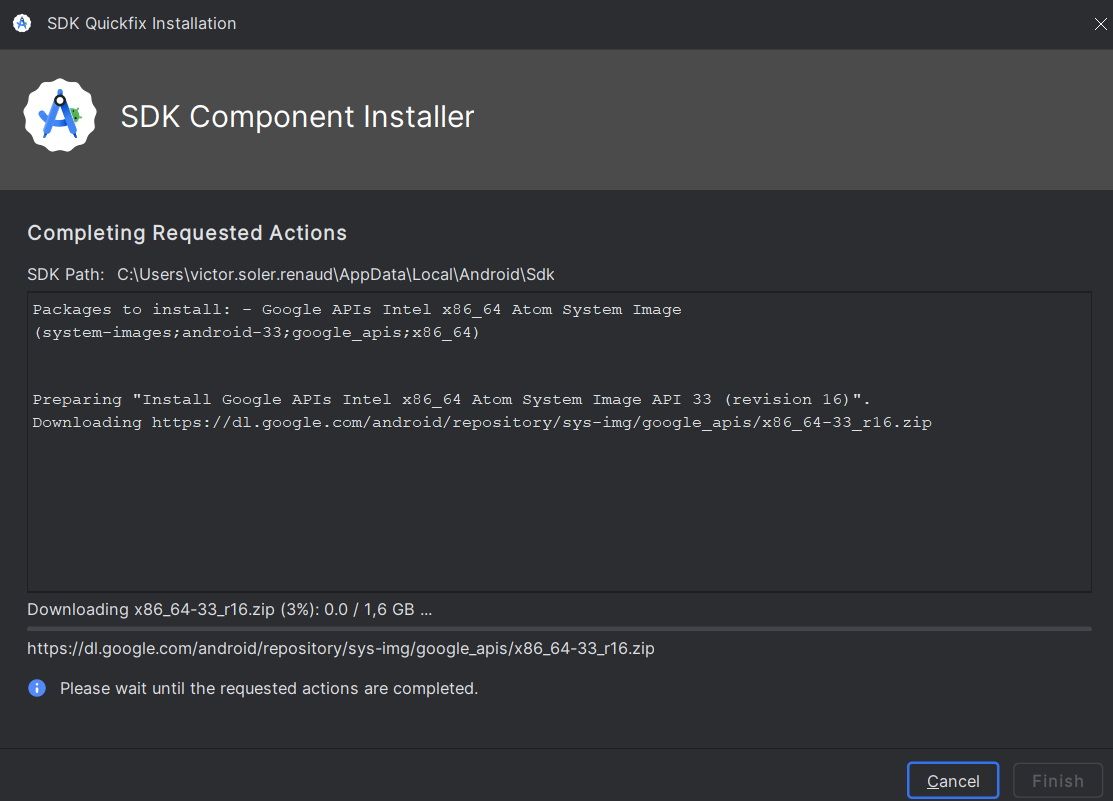
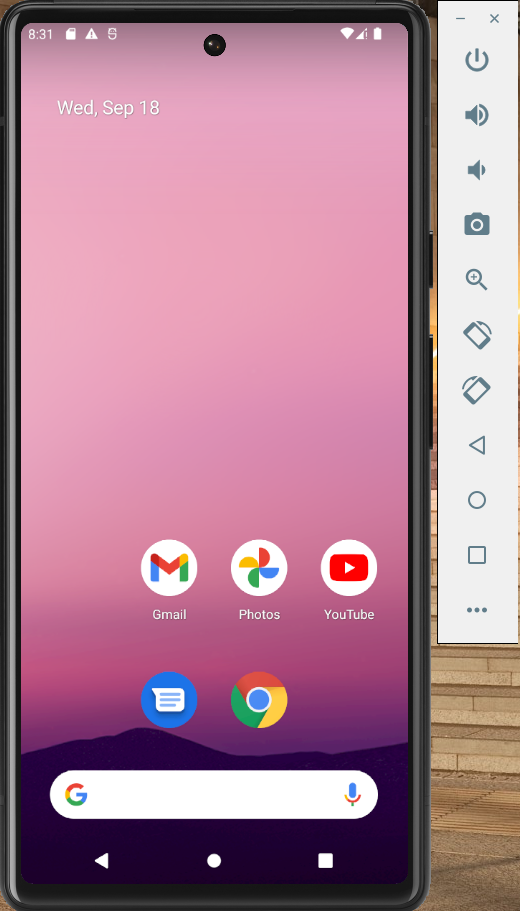
Finally, we can start the Android emulator:
For the next steps, we need adb in our $PATH variable. You will need to add the following path:
C:\Users\<user>\AppData\Local\Android\Sdk\platform-tools
OU
%LOCALAPPDATA%\Android\Sdk\platform-tools
Step 2: Rooting our emulator
We have an emulator running well, but we are limited by the Android system. We are not "root."
"Rooting" an Android device means gaining administrator privileges on the system, allowing you to modify system settings, install apps that require elevated permissions, and further customize the phone. It’s often done to access advanced features, improve performance, or install custom versions of Android.
For example, the certification authorities stored on Android are located in the /system/etc/security/cacerts/ folder. To access this folder and install the Burp Suite certification authority, we need root rights.
To root our Android Virtual Device (AVD), we will use the "rootAVD" utility (https://gitlab.com/newbit/rootAVD).
git clone https://gitlab.com/newbit/rootAVD.git
- Windows
- Linux
./rootAVD.bat ListAllAVDs
./rootAVD.sh ListAllAVDs
Then locate the command provided by rootAVD and execute it:
[...]
./rootAVD.bat system-images\android-35\google_apis_playstore\x86_64\ramdisk.img
[...]
The result should prompt you to select a Magisk version:
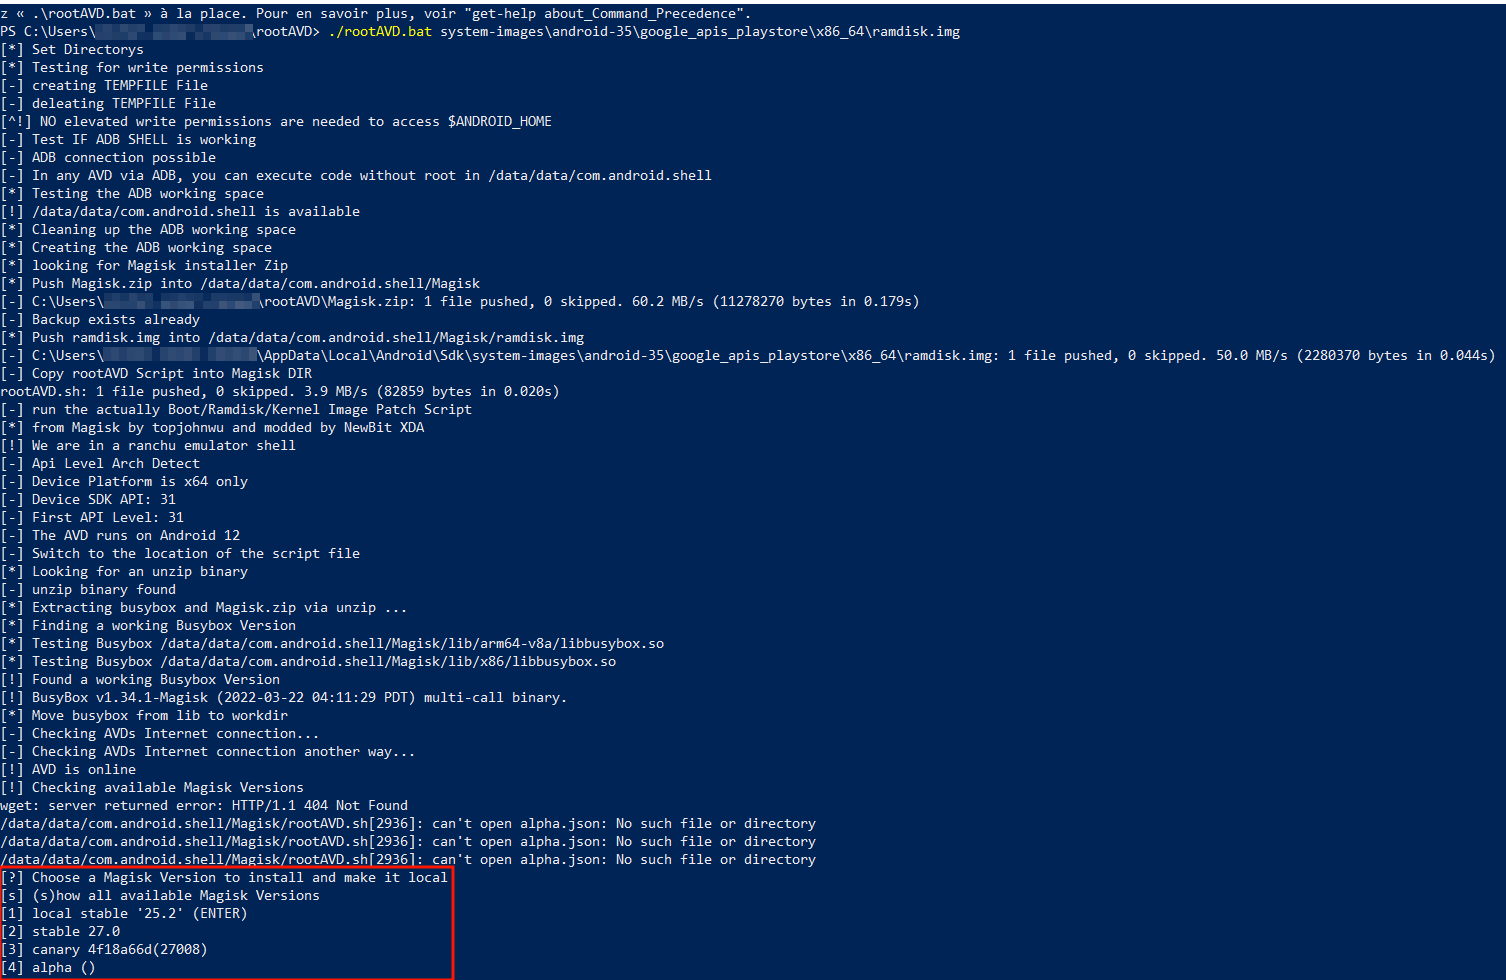
Magisk is a popular solution for rooting Android devices without modifying the file system. It allows you to gain administrator rights while keeping the ability to pass security checks like Google’s SafetyNet. Magisk is often used to customize the system, install specific modules, and manage app permissions more precisely.
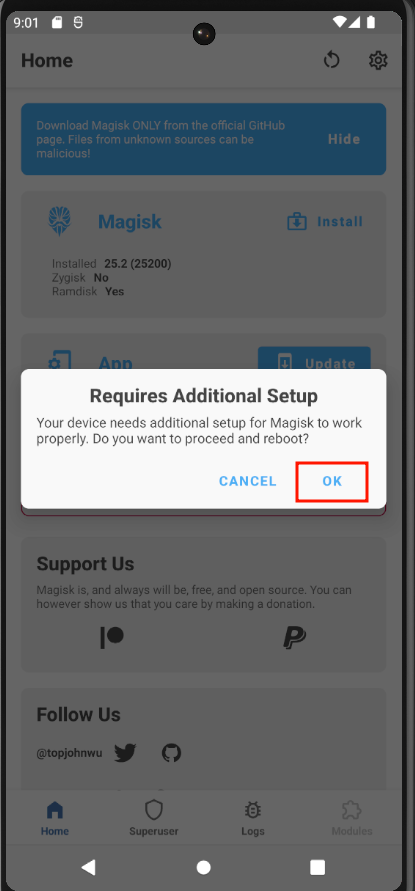
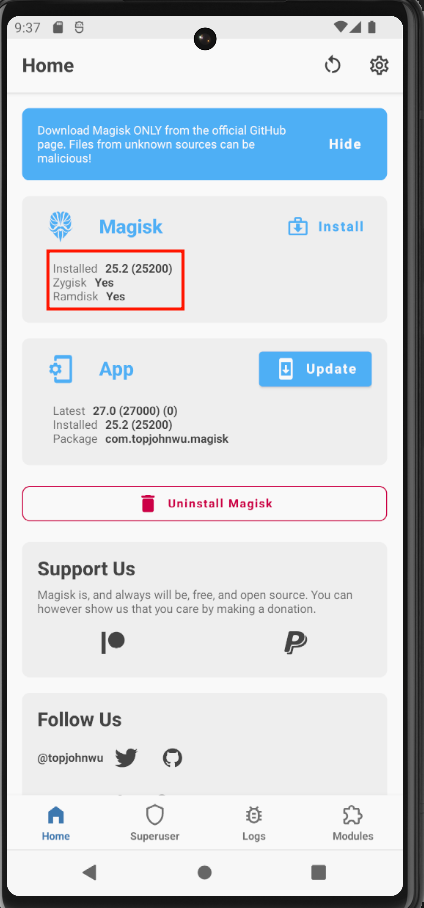
The stable version of Magisk is recommended, but you can choose other versions if necessary. The AVD will restart, and the "Magisk" application will be installed. Once the Magisk app is launched, another reboot will be required:
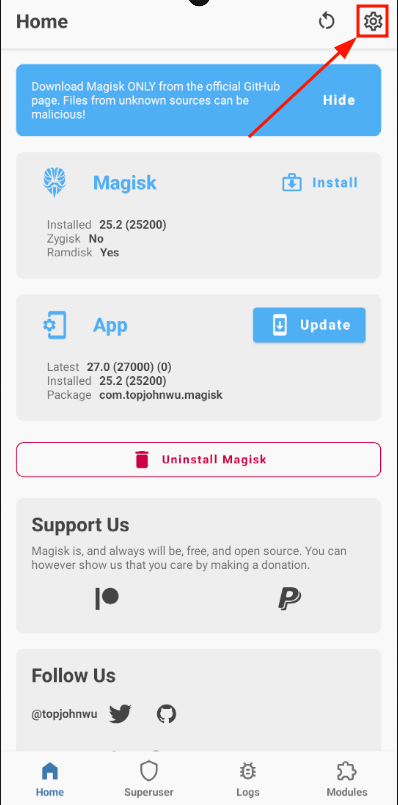
After the reboot, go into the Magisk settings:
Scroll down and check the "Zygisk" box. A reboot will be performed to apply the changes:

Once the reboot is complete, you can check that Magisk has been successfully installed:
To verify that we have root privileges, we can launch an adb shell to confirm we can open a shell as root:
> adb root
restarting adbd as root

> adb devices
List of devices attached
emulator-5554   device

>  adb shell
emulator64_x86_64_arm64:/ # id
uid=0(root) gid=0(root) groups=0(root),1004(input),1007(log),1011(adb),1015(sdcard_rw),1028(sdcard_r),1078(ext_data_rw),1079(ext_obb_rw),3001(net_bt_admin),3002(net_bt),3003(inet),3006(net_bw_stats),3009(readproc),3011(uhid) context=u:r:su:s0
emulator64_x86_64_arm64:/ # whoami
root
emulator64_x86_64_arm64:/ #
We are root!

Step 3: Installing the Burp certificate
We have our rooted emulator, but we cannot intercept any application traffic. This is because the certification authorities installed by default do not trust our Burp Suite (which is normal!).
Android certification authorities are divided into two distinct parts:
- System certificates:
System certificates are installed by default when Android is installed and contain well-known certification authorities:
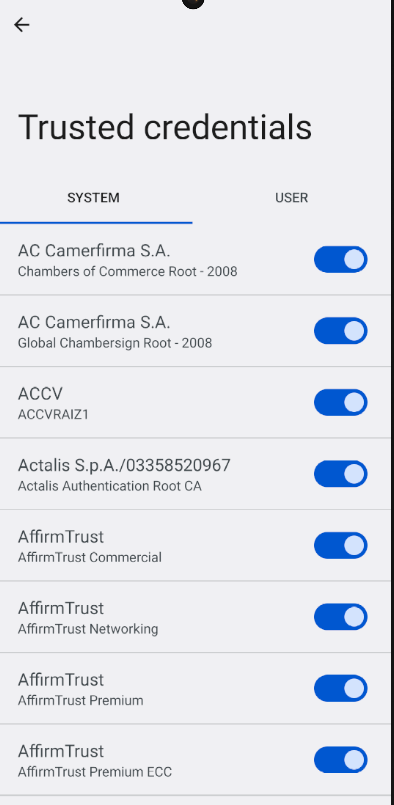
These certificates cannot be modified by the user unless they have superuser or root rights.
These certificates authenticate all types of internet traffic, meaning both browser and application traffic.
- User certificates:
By default, there are no user certificates. These can be installed by the user and only authenticate traffic generated by browsers. No traffic generated by an application can be authenticated by a user certificate.
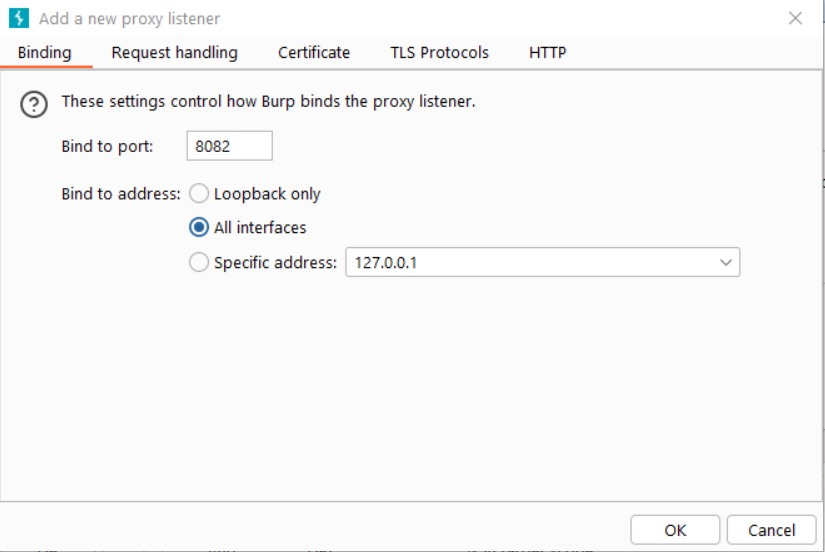
To fix this, we’ll first configure our Burp Proxy to listen on all interfaces. In the proxy options, check "All interfaces" and specify a port:
Next, in the Android emulator, go to the Wi-Fi settings and note the default gateway IP:
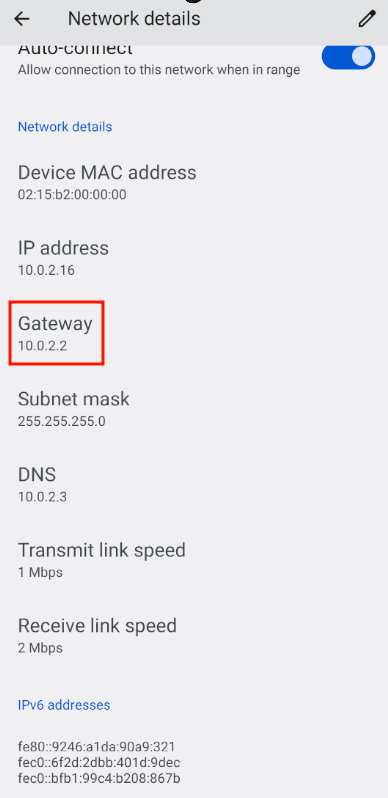
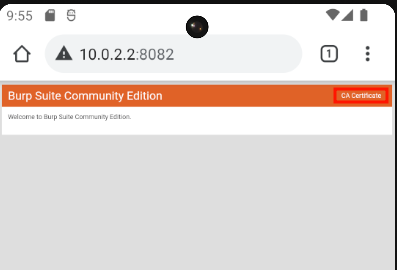
This IP corresponds to Burp. Now, we can check via Chrome if we can access the Burp proxy.
We can take this opportunity to download Burp's internal certification authority by clicking on "CA Certificate":
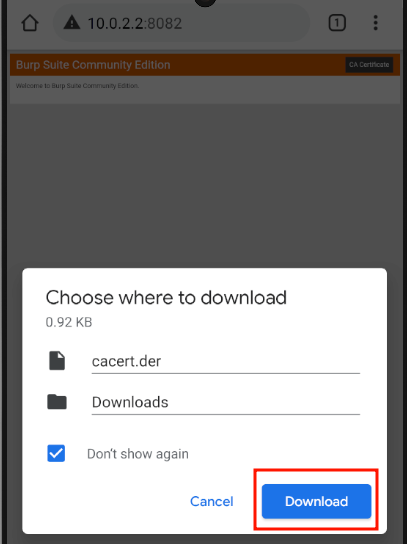
Then go to Settings > Security > Encryption & Credentials > Install a Certificate > CA Certificate > Install Anyway > cacert.der.
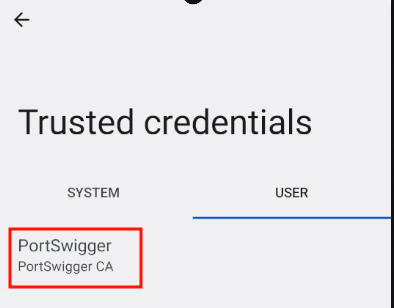
The certificate should now be listed under user certificates:
Finally, to make it a system certificate, we will use the Magisk module "MagiskTrustUserCerts" (https://github.com/NVISOsecurity/MagiskTrustUserCerts).
Download the .zip from the releases: https://github.com/NVISOsecurity/MagiskTrustUserCerts/releases/tag/v0.4.1 and transfer the archive to the emulator via adb push:
> adb push .\AlwaysTrustUserCerts.zip /sdcard/Downloads/AlwaystrustUserCerts.zip
.\AlwaysTrustUserCerts.zip: 1 file pushed, 0 skipped. 0.6 MB/s (3574 bytes in 0.006s)
Then install the module via Magisk, go to Modules, then "Install from storage and select the .zip:
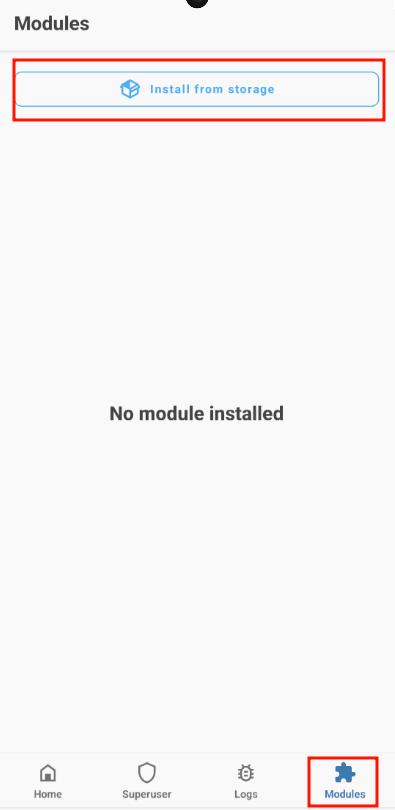
The file will be in the root of the phone, not on the emulated SD card. This can be a bit misleading.
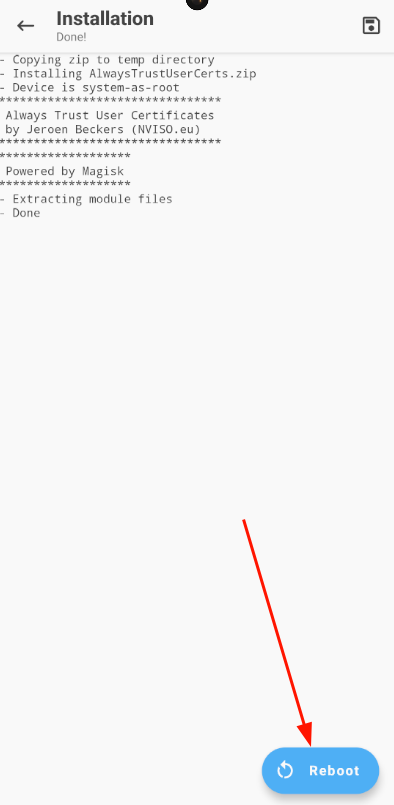
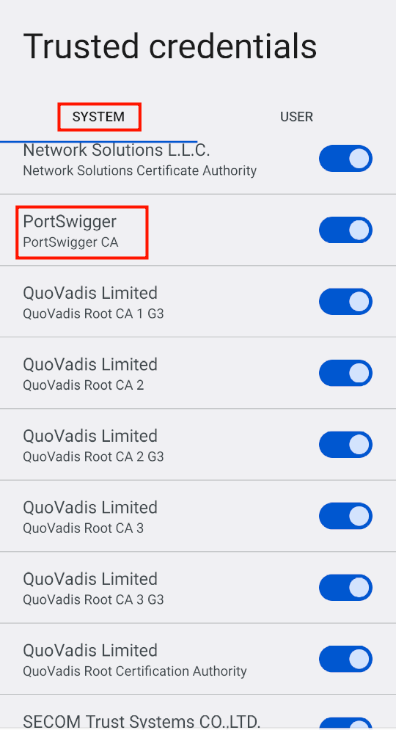
After a reboot, Burp Suite's certification authority should be in the system certificates:
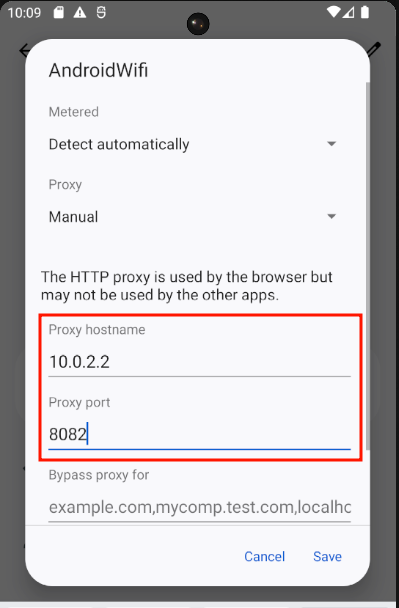
All that's left is to specify Burp Suite as the proxy in the Wi-Fi connection through the advanced options:
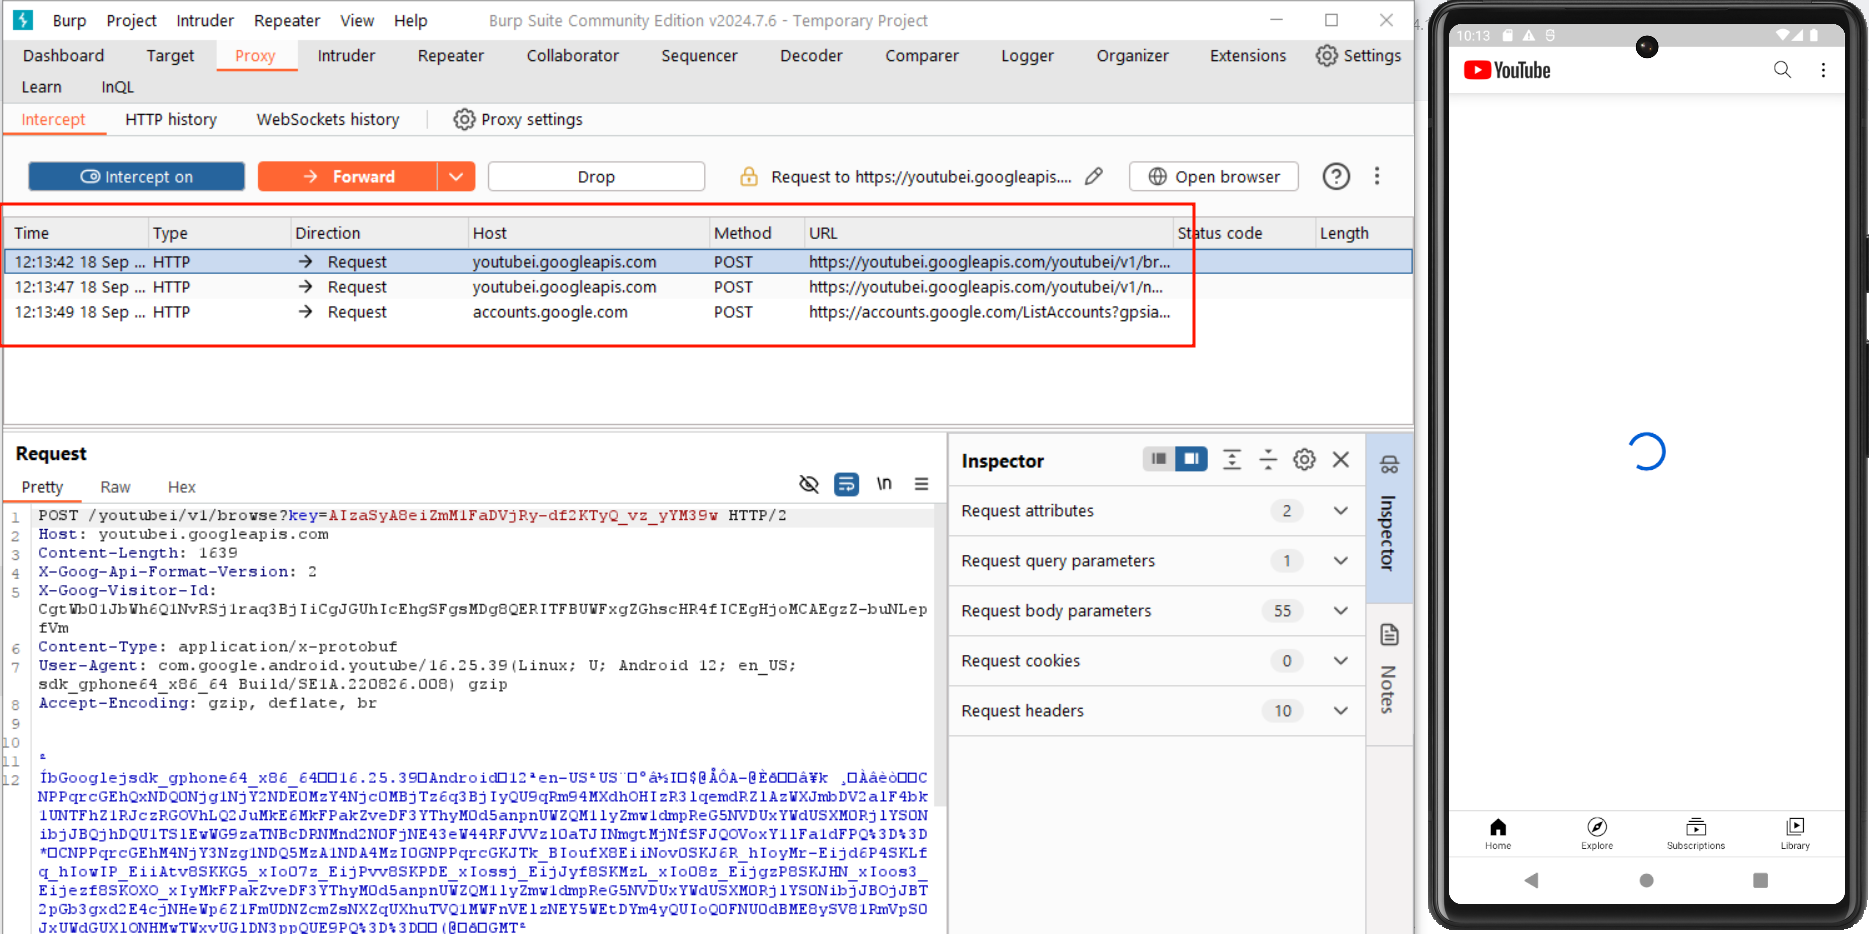
Requests should start arriving at the Burp proxy:
Step 4: Installing Frida server
Frida is a reverse engineering and security tool that allows injecting JavaScript scripts into native applications on various platforms, including Android and iOS. It is used to analyze the behavior of applications, modify their behavior in real-time, and perform security tests. Frida is especially appreciated by security researchers and developers for its advanced dynamic instrumentation capabilities.
To use Frida, you need to have a "Frida Server" running on the emulator and a Frida client on the host. To install Frida server on the emulator, we can use the Magisk module "MagiskFrida" (https://github.com/ViRb3/magisk-frida).
Go to the releases (https://github.com/ViRb3/magisk-frida/releases) and download the .zip file.
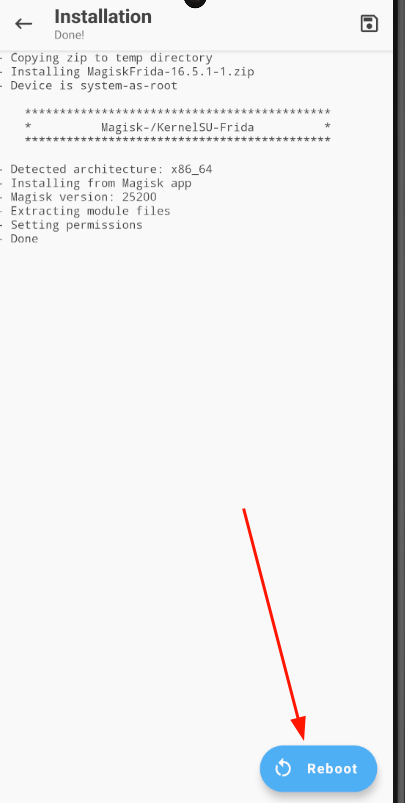
Repeat the same steps for installing the Magisk module explained in step 2 (adb push .zip, install the Magisk module):
Pay close attention to the version of MagiskFrida you install, as the client version must match the server version!
To install Frida on the host:
- Windows
- Linux
pip install frida-tools
Make sure that the path "C:\Users\USER\AppData\Local\Packages\PythonSoftwareFoundation.Python.3.12_qbz5n2kfra8p0\LocalCache\local-packages\Python312\Scripts" or "%LOCALAPPDATA%\Packages\PythonSoftwareFoundation.Python.3.12_qbz5n2kfra8p0\LocalCache\local-packages\Python312\Scripts" is in the PATH to invoke Frida easily.
pip install frida-tools
To verify that Frida client and Frida host are working correctly, we can list the running processes on the emulator with the following command:
> frida-ps -Uia
 PID  Name           Identifier
----  -------------  ---------------------------------------
4790  Chrome         com.android.chrome
5220  Drive          com.google.android.apps.docs
5169  Files          com.google.android.documentsui
3347  Gmail          com.google.android.gm
1407  Google         com.google.android.googlequicksearchbox
1407  Google         com.google.android.googlequicksearchbox
4989  Magisk         com.topjohnwu.magisk
1464  Messages       com.google.android.apps.messaging
4040  Phone          com.android.dialer
2981  Photos         com.google.android.apps.photos
 959  SIM Toolkit    com.android.stk
 967  Settings       com.android.settings
4588  YouTube        com.google.android.youtube
   -  Calendar       com.google.android.calendar
   -  Camera         com.android.camera2
   -  Clock          com.google.android.deskclock
   -  Contacts       com.android.contacts
   -  Maps           com.google.android.apps.maps
   -  YouTube Music  com.google.android.apps.youtube.music
Frida is now working well !
Conclusion
Creating an Android lab for dynamic and static analysis of android applications is a process that requires meticulous setup, but the benefits are substantial. By following the steps outlined in this guide, you have learned how to configure an Android emulator, root it to gain administrative rights, install essential tools such as Burp Suite and Frida, and set up an effective environment for analyzing and testing applications. Creating an Android lab for dynamic and static analysis of android applications is a process that requires meticulous setup, but the benefits are substantial. By following the steps outlined in this guide, you have learned how to configure an Android emulator, root it to gain administrative rights, install essential tools such as Burp Suite and Frida, and set up an effective environment for analyzing and testing applications.